Building a Solar Collector
Things get slow over the winter season for me and, as they say, idle hands do the devil's work. In this case, they built a solar collector for my garage.
The project did not require any fancy materials and the basic plans were available on the internet (though I tweaked them considerably.) All told, the project took a couple of days. For someone handy, it would have been a single day project, but my fine carpentry skills start and stop at the "Honey, where's my sledge hammer?" stage.
Building the Collector

My first step, after gathering supplies, was to build the collector itself. Since I can’t follow a simple recipe, this is where I began deviating from the plans. The colector sits inside the frame and absorbs the solar energy. I intended to use a small duct fan to boost air flow, so instead of designing the system to flow up the screen using natural convection, I made it a down-draft panel with the cold air coming in at the top and the fan sucking the warm air from the bottom.
Then I made three more changes. The original plans called for two layers of mesh. I went with five. I also changed the material from the plastic mesh to black aluminum screeen. (In hindgsight, I think the black plastic mesh would work just as well.) The final change in the collector was to add black plastic to each layer in a staggered pattern so that the air is always in contact with a solid, warm surface.
To anchor all the mesh, I used a frame of 1x2 lumber and mounted each layer on lathe strips (because they are skinny and cheap.)
Building the Box Frame
This is where my general lack of handiness asserted itself. This was combined with at least one moment of total nit-wittery. We’ll get to that shortly.
I spent a bit more money to buy pressure treated 2x12 lumber for the exterior frame. It can be done with less expensive materials, but I paid the additional cost in the dual expectation that the collector would work (there were doubts among friends, family, and the neighbors) and that it would last the next 20 years.
I cut the wood to fit with the bottom edge of the supporting side beveled to improve my angle to the sun. Then I inserted the top and bottom planks and proved to myself that I can be an idiot.
I built the collector to be four feet by eight feet. When I inserted the top and bottom, they were slightly larger than four feet so I could get the collector in without busting it apart. So far, no problem. I bolted everything together, easy as pie. Then I tried to drop the collector in – and discovered my little math error. The collector wouldn’t fit by 1.5 inches. When I measured for the longer axis, I neglected to account for the thickness of the bottom board.
Crud. Given no choice but to undue my work, I did. Re-measured (carefully this time!) and put everything back together. This time, the interior collector fit, if a bit snugger than I intended.
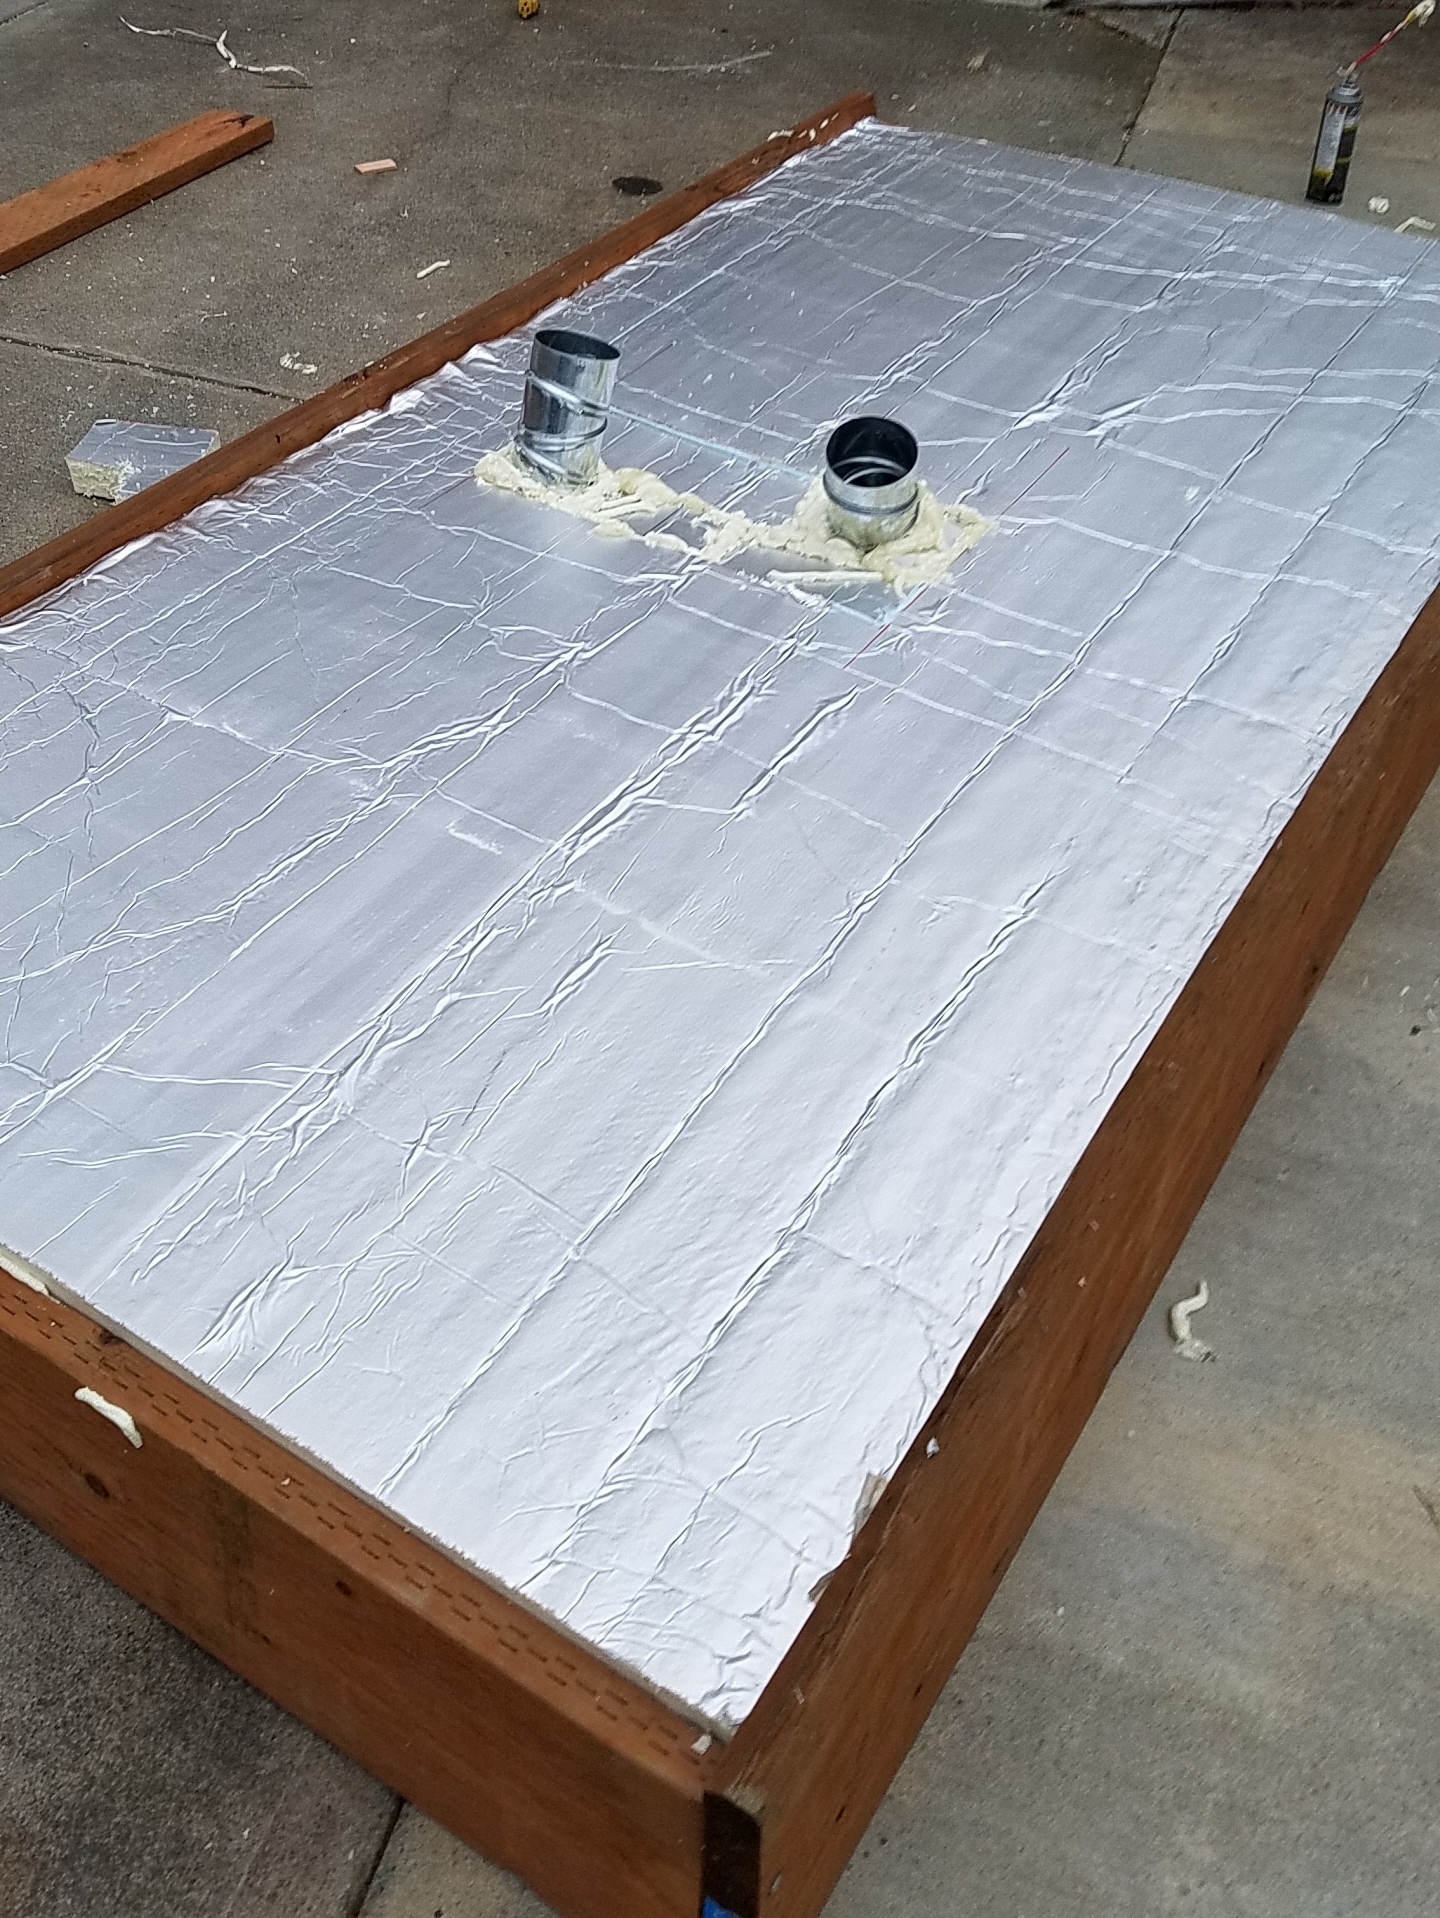
Insulate, Seal, And Ductwork
The next phase was to insulate the box with foam and caulk seal all the joints. Pro-tip for homeowners – if you want to save money on heating and cooling, don’t by a fancier furnace or expensive windows. Insulate and air seal – you’ll get your money back in a year or two.
Once the insulation was in and I got caulk smeared everywhere, I added the ductwork using inexpensive dryer ducting. I insulated that, too. Flipping it over, I caulked the plexiglass to the front of the frame and the collector was ready to move to the south side of the garage.
Remember the bevel cut at the bottom? The second purpose for that was to add stability to the whole frame so I wouldn’t need to screw it to my wall. The frame is heavy enough that wind will not bother it.
The ductwork extended past the back of the box enough to enter in a window. Just as I didn’t want a dozen screw holes in my siding, I didn’t want to cut holes into it, either. So, the window. I framed out ducts with more insulation, sealed with expansion foam and used the window to lock things down tight across the top the same way you would with a window air conditioner.
On the inside of my unheated garage, I ran a 20 foot length of dryer duct and added the fan. The discharge point is right over the laundry machines. The fan is on a timer.
So Does It Work?

Better than expected, actually. The heat on a sunny day coming from the collector exits at better than 100 degrees. Remember that this piece of ducting is 20 feet long, so there is considerable temperature loss along the length of it. When I measured the immediate discharge piping with my infrared camera, the temperature was over 140 degrees. Very pleasing!
On really cloudy, rainy days, it works, but not as effectively. The heat output is usually between six and ten degrees above the input temperature, so it is still heating.
During an average winter, the garage gets down to freezing and stays there. This year, it has gotten as warm as a balmy 63 degrees.
All in all, a fun project that will also save me money in the long run, and it’s kind to Mother Nature. I think I’ll build another one next year for my office.