
Is the Wall Moving - Or is the Floor?
Commercial inspections, known as property condition assessments or PCAs, are a totally different beast from a residential inspection. The standards are very different with commercial work much more focused on the document record and future expenses.
Some problems are common to both residential and commercial work. Foundation issues can obviously affect both and this commercial job was one of the more interesting that I have encountered.
Here, the owner who commissioned the PCA thought that he had a problem with the masonry walls of his building moving so, I naturally started there, examining the exterior foundation and wall assemblies.
Lo and behold, no major movement. There was minor cracking in the mortar joints of the masonry system but nothing that suggested a major failure.
Inside, I had considerable wall separation so I understand why the owner thought the walls were moving. However, I am simply not willing to take things on face value. I investigated further. As it turns out, the exterior walls were plumb. They weren’t moving. That being the case, I turned my attention to the floor. Now, I know, everyone expects the floor to be flat, almost by definition so that seems just silly. I checked anyway. I started tapping on the tile and found hollowness underneath. Time to break out the level again. The floor was not flat.
“Hmmmmm,” he thought.
So, what was going on?
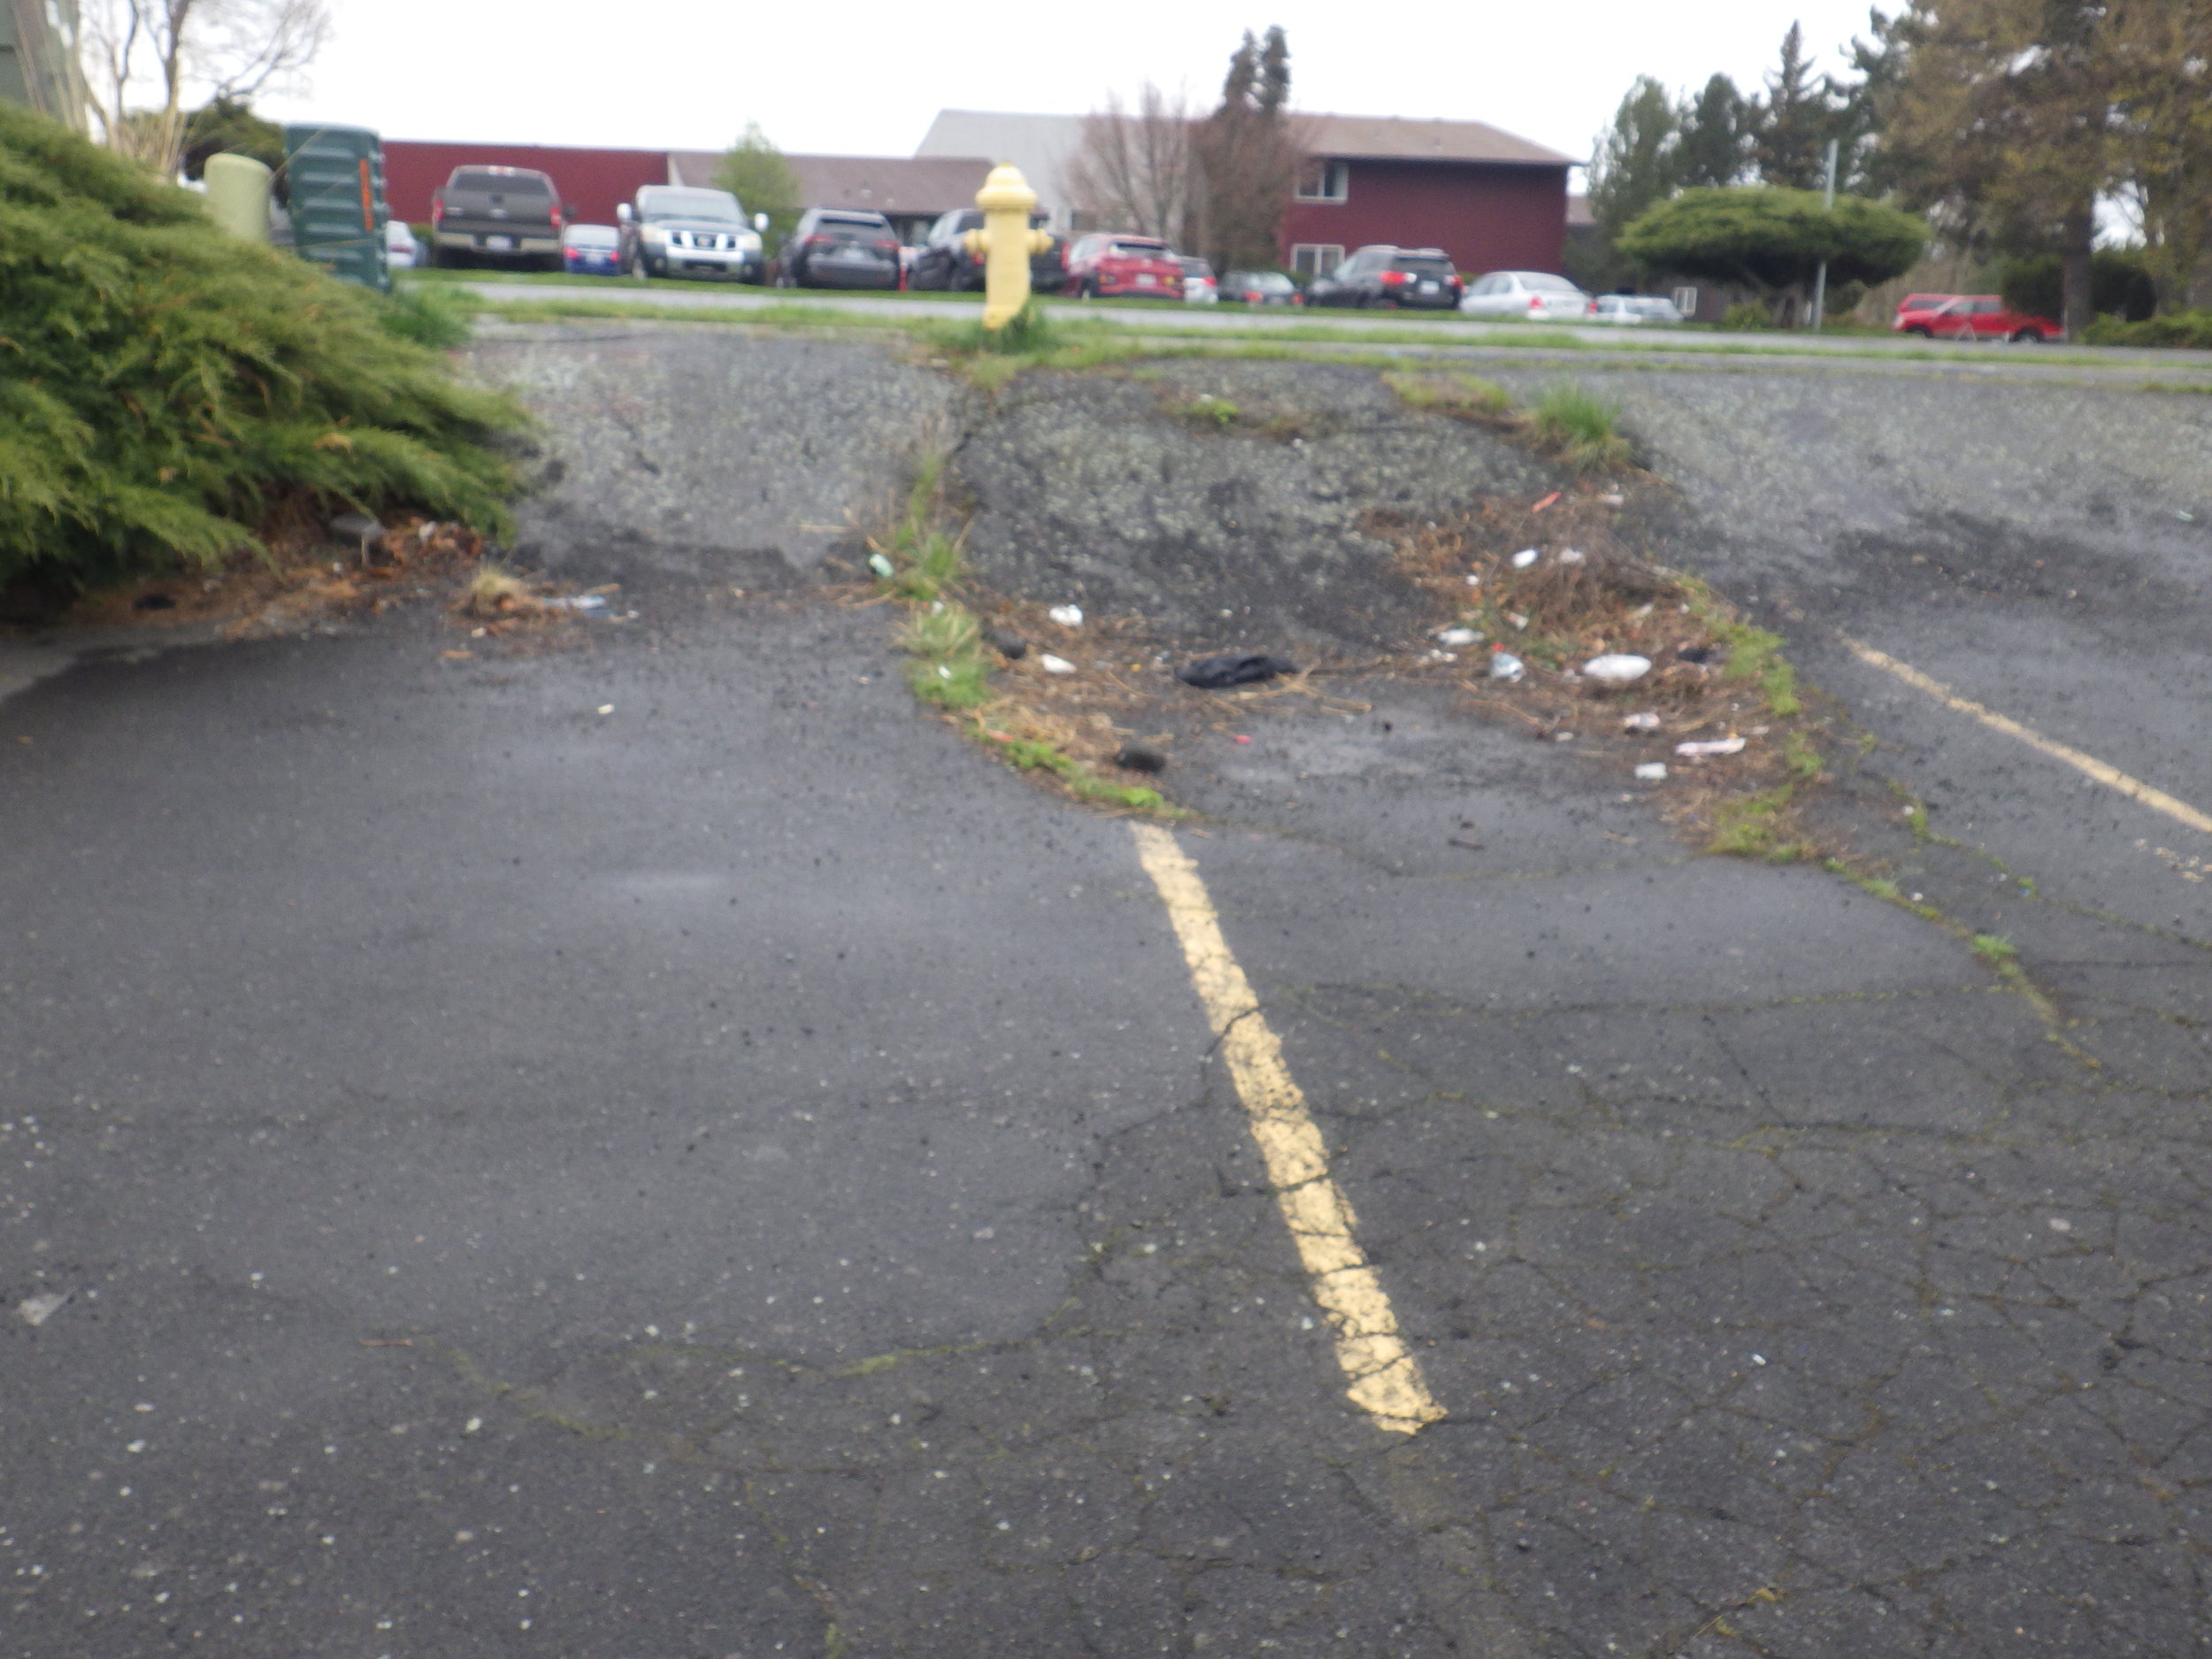
If you look at the this picture, you'll see soil subsidence at the water meter and the fire hydrant. The obvious question to ask is "Do we have a major water problem at the curb?" Is there a leak on the water main? At the hydrant? Maybe the storm gutter for the street is failing?
Now, I'm guessing that you are already ahead of me here. Yes, the building is DOWNHILL from this apparent leak. My best guess was that the water flowed under the building causing a combination of erosion in some areas and soil expansion - clay soils can expand greatly when hydrated. That would explain the hollow areas AND the up-raised edges.
My recommendations? First, find and correct the source of that water. Second, they need an engineer to determine how badly the structure is damaged and how to repair it.
I'm glad the owners called me when they did - water problems such as this NEVER get better with time.
It's Swarming Season
It’s an unwelcome sign that spring is here, but swarming season has begun. If you spot these winged reproductives, call you local Pest Control Operator.
In Idaho, I call them carpenter ants. In Washington, due to regulations, they are ‘suspected wood destroying organisms.’
In either case, they’re trouble.

Raised-Heel Trusses
Since the late 1960s, most houses have been built with engineered trusses (click on the link for more information than you need) instead of traditional rafters. Trusses offer greater spans to open up our interiors with great rooms, require less time and labor to erect, and provides a more uniform pitch to the roof, which may not seem important to you, but your roofer loves it.
Early truss systems resembled a triangle with a bunch of triangles inside the outside one. The problem that we ran into, from an energy usage standpoint, were those skinny angles at the ends of the truss. Often, there was not sufficient room to get an adequate amount of insulation into the space. I see a fair number of homes with shadowing on the ceiling at the outside edges of the rooms from precisely this.

A 1970s Engineered Truss
Note how skinny it is at the low edge. Not much room for insulation.
When energy was really cheap (raise your hand if you can remember $.25 gasoline!), this was not a big priority. Today, with more expensive energy and an improved awareness on how to heat and cool our homes efficiently, what happens on that edge is important. One solution was to re-design the truss. Meet the raised-heel truss.
The raised-heel truss
Raised-heel trusses are engineered to provide enough space for the insulation. By design, they are taller than older truss designs at the point where they cross the wall. This section, called the heel, intersects at the perimeter wall and lifts the top chord of the truss. From my research, it looks like the energy-saving qualities of the raised-heel were not the primary reason they were developed, though. Initially, the were built to match roof lines and increase curb appeal. Go figure . . .
Even though the cost for these trusses are not substantially higher than with other truss systems, I still don’t see that many of them. When I do, it’s good news for my clients!
(A quick note on the video - I shot it in an attic while hanging from the framing - it might not sound smooth and polished.)

Is Your Crawlspace Holding Its Breath? Crawlspace Ventilation
In the old days, when curmudgeonly grandfathers ran home maintenance, they'd go close off all the crawlspace at the first indications of frost. The reasoning was simple - once winter set in, leaving the vents open would chill the occupants and freeze the pipes. Best to close them early.
Those old houses, built up through the 1960s often had no insulation in the floor of the home. Heat rises (it doesn't, really, but hot air does) so they did not see the need to waste the money on insulation in the joist cavities.
Fast forward from 1940 to the oil shocks of the mid-1970s and suddenly we were greeted with a renewed interest in energy conservation. We increased attic insulation levels, moved from four-inch exterior wall framing to six-inch and, surprise, found that insulating the crawlspace made a lot of sense.
Grandpa still closed the vents, though. Old habits die hard.
What no one explained to them was that the vents for the space are designed to relieve moisture from the sub-grade spaces. Once we moved the thermal barrier into the flooring system, there was no reason to close them as getting water vapor out far exceeded any energy savings.
The current code is to have at least one square foot of ventilation opening per 150 square feet of floor area with an opening located within three feet of corners. Obviously, home inspectors don't measure this. Still, we can eyeball it and, more importantly, can identify problems that arise from improper venting.
Reporting on the crawlspace ventilation is a mandatory part of a Washington State home inspection. WAC 308-408C-150 states, "Insulation and ventilation. The inspection of the insulation and ventilation includes the type and condition of the insulation and ventilation in viewable unfinished attics and subgrade areas as well as the installed mechanical ventilation systems. (1) The inspector will: Inspect the insulation, ventilation and installed mechanical systems in viewable and accessible attics and unfinished subfloor areas"
The purpose of ventilation, moisture removal, makes a big difference in the overall health of the crawlspace and the structural components located in there. High moisture levels lead to potential pest intrusion and mold growth. Subterranean termites and anobiid beetles both require sufficient moisture to thrive. Obviously, as homeowners, we want the exact opposite. Both of those articles I linked to point out the importance of adequate crawlspace venting.
So, leave the vents open, insulated the floor, and make sure the vapor barrier is in great shape.
Houses Don't Levitate
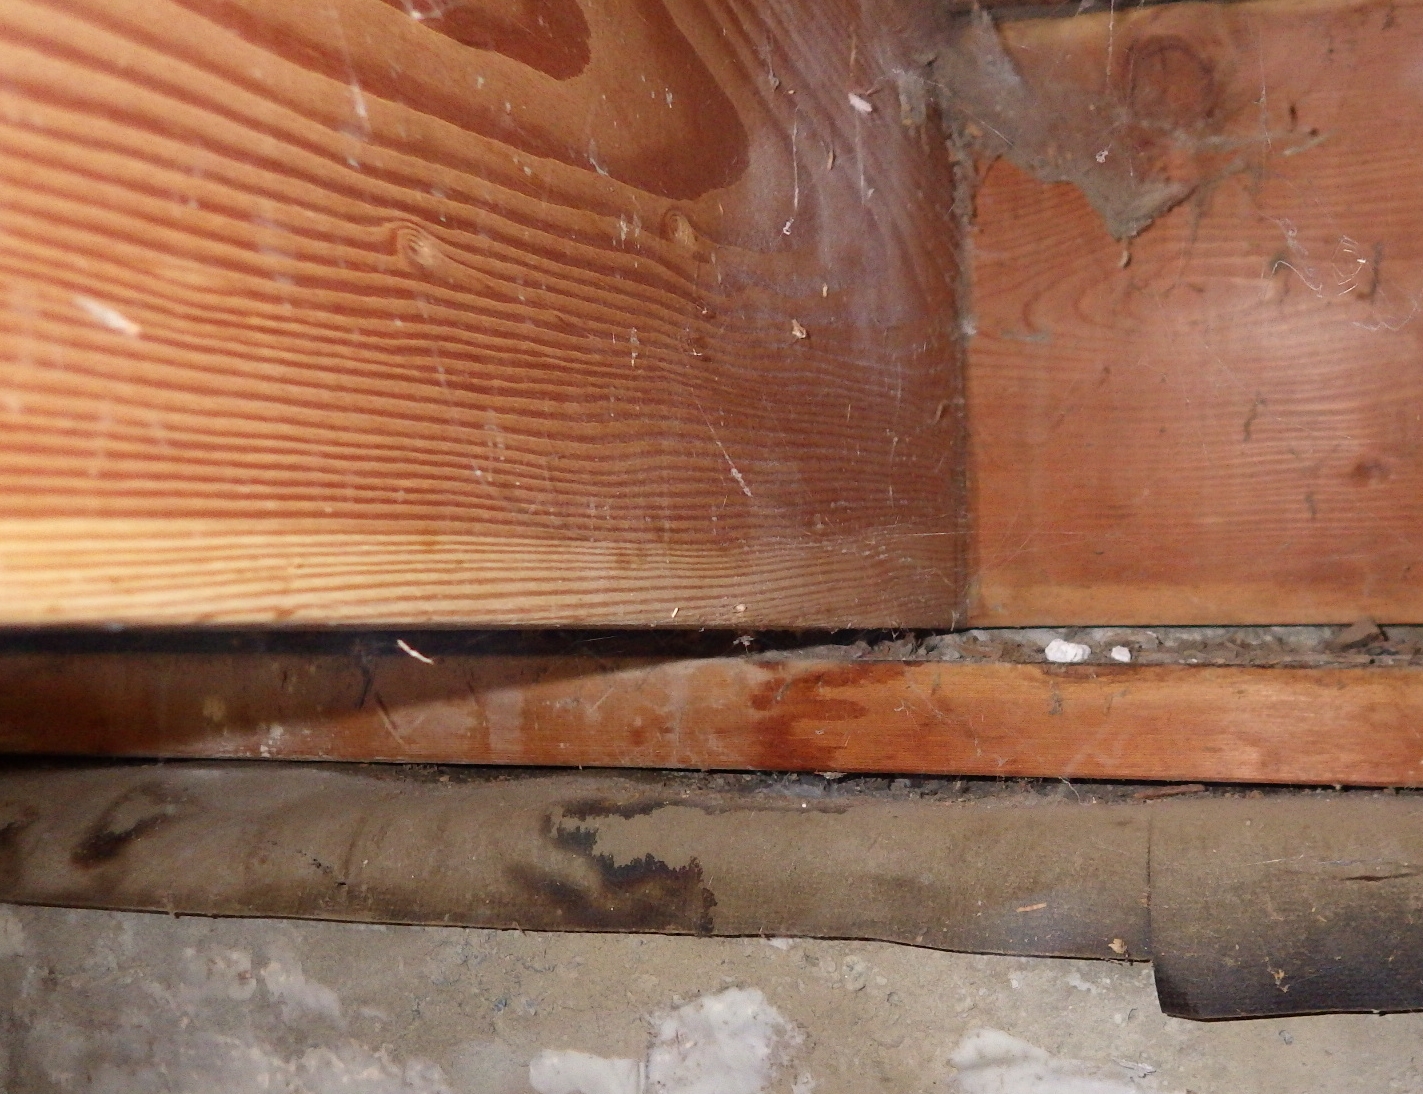
I know we're closing in on Halloween, but last time I checked, house framing doesn't float in the air above the foundation wall like Casper the Ghost. There's a reason inspectors need to physically enter the crawlspace.. Here, the floor joists are a half-inch from the sill plate and there's also a gap below the sill plate (and no anchor bolts to be found!) Add to it cracks in the wall an inch or more wide with substantial deflection, and yep, I punted. This is one for a structural engineer like Evan Laubach of Pullman. He's terrific at finding solutions to major issues, usually in a cost-effective manner.
Traversing Attics
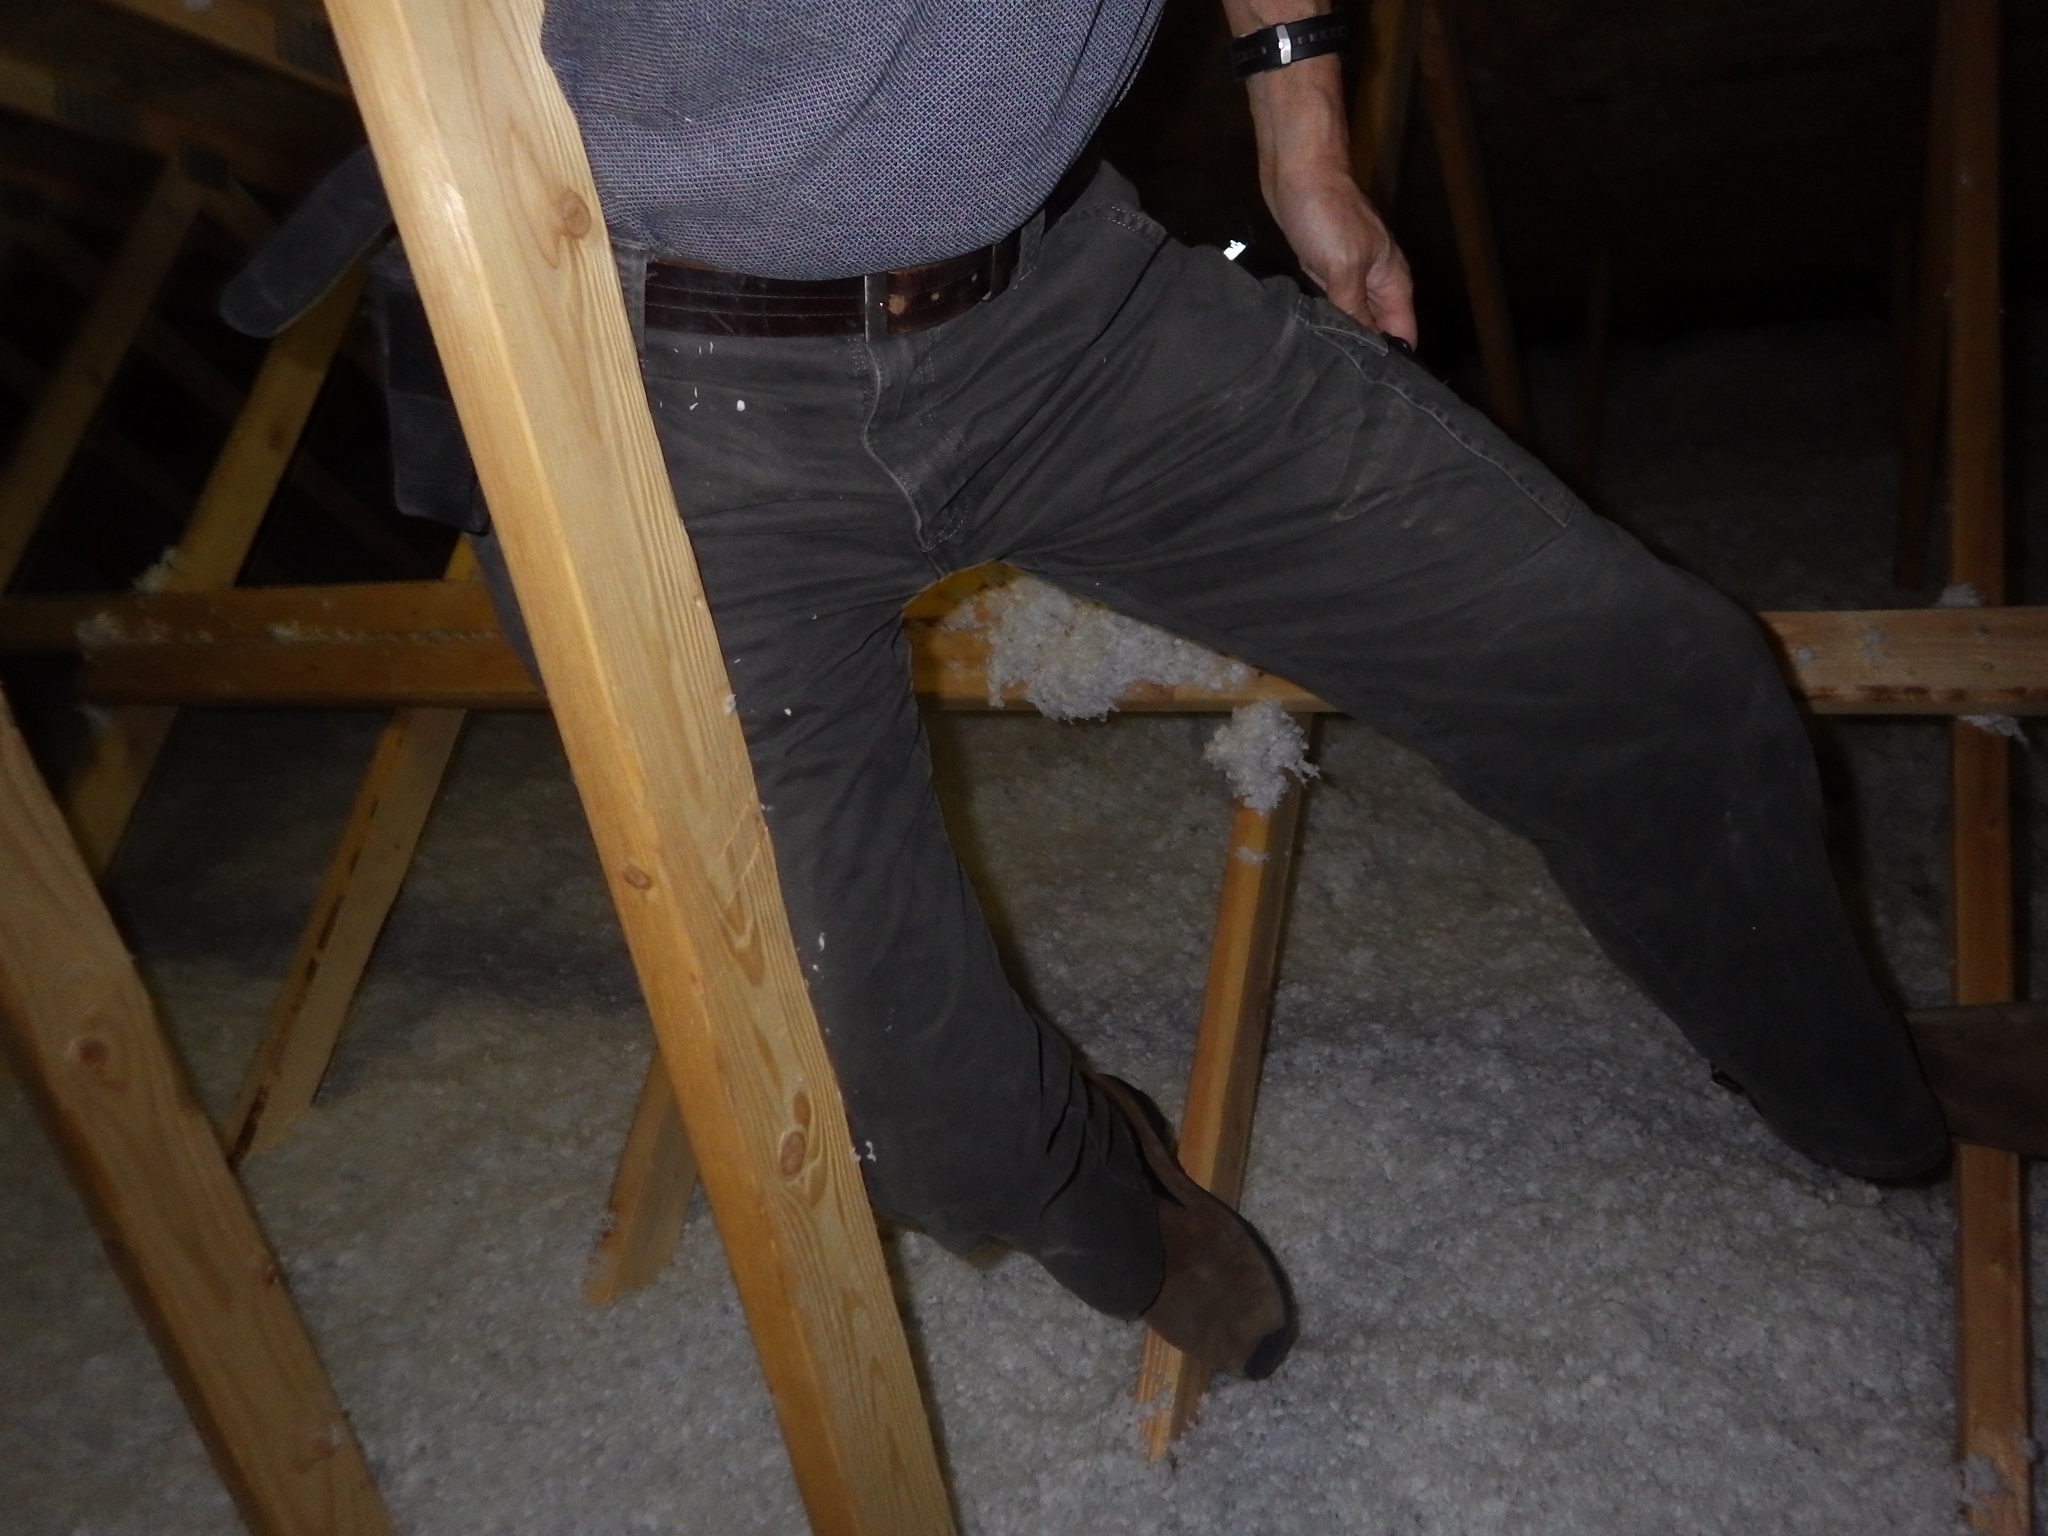
I have a few tricks for traversing the attic without destroying the insulation. One is to take advantage of physics by anchoring in more that one plane. In this attic, had my thigh leaning into the web on the left while my foot took the load on the bottom side. Traversed the whole attic with nary a footprint in the fiberglass.
Railroad tie retaining walls
 In Pullman and Moscow both, a ‘natural-look’ trend using railroad tie retaining walls took place from the mid-1980’s to about 2000, when masonry block supplanted the trend. The advantage of the railroad ties was the number of them dropped onto the market as local rail lines got torn up and the creosoted wood was nearly given away.
As is usually the case, the contractors that first started using the ties had no idea of what a wall constructed of wood should look like. Mostly, they pretended that it was just like a concrete wall. They stacked the ties, drove spikes through them vertically and—viola’—counted it as good.
In Pullman and Moscow both, a ‘natural-look’ trend using railroad tie retaining walls took place from the mid-1980’s to about 2000, when masonry block supplanted the trend. The advantage of the railroad ties was the number of them dropped onto the market as local rail lines got torn up and the creosoted wood was nearly given away.
As is usually the case, the contractors that first started using the ties had no idea of what a wall constructed of wood should look like. Mostly, they pretended that it was just like a concrete wall. They stacked the ties, drove spikes through them vertically and—viola’—counted it as good.
It wasn’t. The railroad ties are prone to rotating and the spikes aren’t enough to resist the motion. Add to that the ground pressure, especially when the native loess around here gets wet, and the retaining walls tend to pick up a lean pretty quickly.
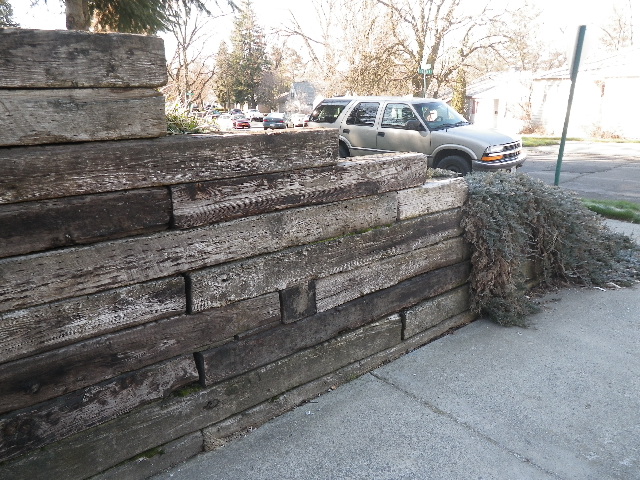
There’s a way to fix the issue, though. At the time you build the wall, you include tiebacks. Tiebacks can be made with steel rods and use anchor bolts to flat plates at the outside of the wall. A more attractive solution that works equally well is to use the railroad ties themselves as the tiebacks by turning an appropriate number of them perpendicular to the wall, extending into the hillside you are retaining.
If you look at the railroad tie retaining wall in the picture, you can see a tieback in the lower middle part of the picture where the end profile of the tie is visible.
No, I can’t tell you the appropriate number of tiebacks – that is known as engineering and I’m not qualified. As an inspector, I recognize when this has been done (and hasn’t, obviously) and point it out to the client.
Now, for the other problem with using railroad ties in retaining walls, at least in Pullman and Moscow—the ties are a multi-story hotel for carpenter ants.
The creosote coating will keep them from penetrating the surface of the wood but any cut ends or sections that split will provide an entry point. Once inside, the carpenter ants will set up house. Unlike most other wood destroying organisms in the Pacific Northwest, the ants don’t eat the wood. They excavate and create shelters.
While their presence in the wall will weaken it, they’re not yet a threat to your home until they attempt to colonize it in the same manner they took over the railroad ties. As part of a home inspection in Washington State, the inspector is required to inform you of potential conditions conducive to this type of infestation. Note the difference . . . potential. Just because the condition exists, it does not automatically follow that an infestation is imminent.
It would be prudent to have a professional keep an eye on the potential for you and, if it’s a concern, provide treatment options. A pair of companies I like are Sunpest and Hayden Pest Control. {Disclaimer-Sunpest helps me with my dandelion issues.}
Railroad tie retaining walls are an attractive landscaping feature but, when buying a new home, look for the signs (or make sure your inspector looks) of good construction and be mindful of the pest issues. Otherwise, enjoy the natural beauty they bring.
Hire the Skinny Inspector
This is a part of an on-going joke about why you hire the skinny inspector.
Today's inspection had me practicing my Houdini routine to get into a crawlspace that the current owner didn't even know was there. I'm guessing her inspector, if he's still around, is due a phone call. Anyway, here's the picture. It was actually pretty darn tight, especially trying to get 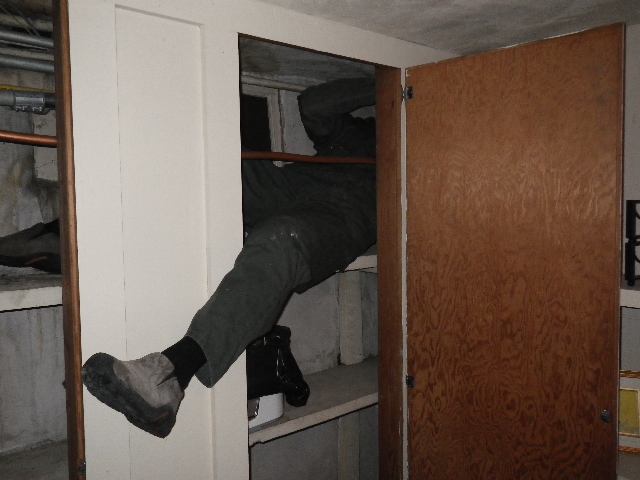 back out. Many thanks to my client for snapping the pic - super-nice folks and a grand old house.
Obviously, one of the recommendations that I'll make is to increase the size of the access. They actually have plenty of room to do so but nobody ever bothered. If nothing else, it will make it easier to add the vapor barrier and insulation that are missing.
In the meantime, it's a win for a skinny inspector-me!
Hope you had as much fun working today as I did.
Don't Break the Cripple Wall
Jack's neighbors called the cops - that's how loud the noise was when the top plate of his cripple wall broke - and they worried that he had shot himself. . Before we get into the details of Jack's case, who knows what a cripple wall is? . . . . Yeah, about what I figured. I'll keep it short.
The cripple wall is a short structural wall built within the crawlspace and designed to provide support to the home. It replaces the old post and beam system that we used in home up through the 1970's. The cripple wall is less expensive to install, less likely to move (it's usually built on a concrete footing), and easier to build. I've put in a picture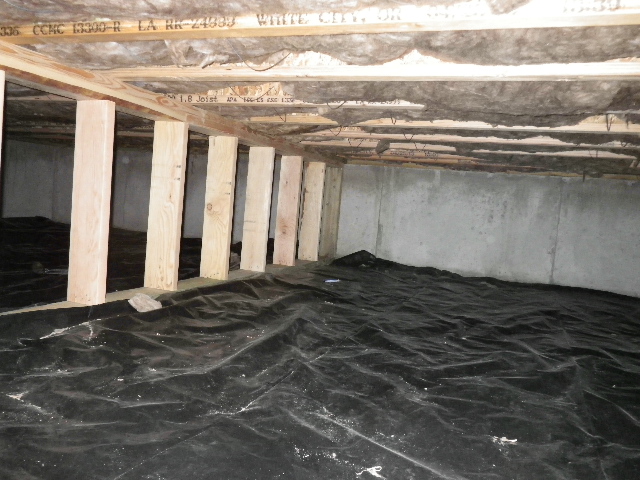 to help you visualize it. As you can see, it looks just like any other framed wall - a sole plate, a top plate, studs. The size will vary depending on how much load needs to be managed but most are either 2x4 or 2x6 pieces of lumber.
There is another similarity to the walls of your home - since this is a structural wall, it needs headers when the studs are removed just as the exterior walls have at the doors and windows.
Most of the time, these are installed automatically to make moving through the crawlspace easier - even for a skinny inspector, trying to squeeze my butt through a 14 inch opening takes a little wiggling.
Sometimes though, I find that either a plumber or the HVAC installers decided that the studs are in the way so they knock them out. No biggie, they think, quite erroneously.
Whoever installed Jack's ductwork knocked out two of the supports so instead of bracing every 16 inches as needed, the top plate spanned 4 feet. That's a long way for a 2x4 to carry load.
The 2x4 also had a knot in it at about the midpoint of the span. Knots are weaker and more prone to split. When they do, it happens fast and sounds explosive.

The effects of the HVAC contractors abuse of the foundation system aren't over. Each part of the system relies on the other parts to perform. Now the studs at either end of the opening are doing more work than they were intended so they will become increasingly likely to fail as well, and, like a set of very slow moving dominos, may affect the whole cripple wall and the interior walls above it in the living spaces.
The good news is that repairs are both possible and not very challenging or expensive. We need more support for the cripple wall on both sides of the ductwork. We also need a fix for the broken top plate - which is where I punt and suggest you need an engineer or really good structural contractor who's done these types of repairs before.
For those that are curious, this house is less than seven years old. If an inspection had been done on it at the time of purchase, the damaged cripple wall likely would have been spotted and fixed.

Washington State License #215
Former SBCC Member, Former Chairman State Home Inspector Advisory Licensing Board.